Choice of paint
In my experience the best paint job is the original one. Even a professional re-paint will not be as durable as the factory paint. Unless the original paint is quite a mess, I would either leave it as it is, or touch it up using some touch-up paint available from a paint shop such as Spraystore in Christchurch. Given a sample of the piece you are working with they can supply a small pot of colour matched paint for $12.
If you have decided to re-paint the bike, there are a number of approaches you could take. I have listed my experiences below, from most positive through to worst. Unless there is some extremely good reason, in the future I'm always going to opt for number one.
1. Enamel paint
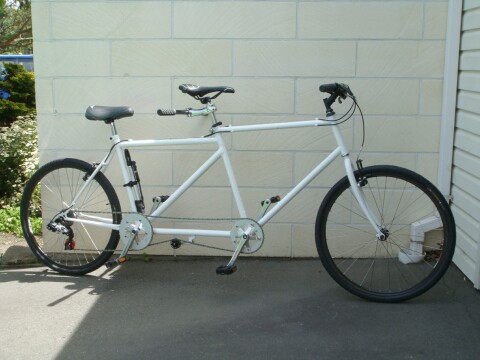
Step one is to have the frame garnet blasted (for steel frames) back to bare metal. An optional step is to fill and sand any imperfections on the frame. Next, have the frame painted in an enamel by a professional. This is all very easy and less expensive than you might think - see example pricing at the bottom of the page.
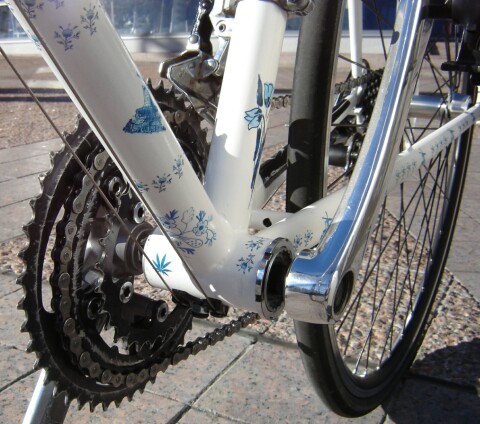
The paint is quite durable and long-lasting. I have seen decade-old examples that still look very good!
End of lesson, no need to consider any other options.

Enamel - cheap, pretty quick and no hassles
2. Powder coating
OK, so you had to ask...
Take the frame to a powder coating shop. They will prepare (garnet blast for steel frames) and paint it. Nice and easy and not very expensive.
Opinions vary on powder coating. Whether enamel or powder coating is more durable I think comes down to the individual case. There are cases where powder coating has been done poorly and moisture has gotten under the paint and the item rusts away in short time from the inside. Then again I'm sure there are cases where enamel paint jobs have been messed up too.
To me powder coating seems durable - even more so than enamel. There are two gotchas however.
- It's much harder to remove if you ever want to paint the bike again.
- It's not possible to paint over anything but metal. This means you cannot use regular auto filler on the frame you want to have painted. If you used an angle grinder to remove those unsightly braze-ons from the frame, you're not going to be able to fill them in with anything but metal or a filler that contains metallic particles thereby making it conductive; an added complication!
When marked, powder coating tends to graze rather than chip, as enamel paint tends to do. You may wish to take this into account when ultimately deciding which finish is better for you.

Powder coating - also cheap, pretty quick and no hassles
3. DIY spray can, expensive
Prepare the frame by removing all the old paint. Either use paint stripper (you will need about $30 worth at least), a sanding wheel for a drill (probably need a few at $15 a pop), or a combination of the two. Paint stripper is very hazardous! Basically, getting all the paint off the frame at home is slow, expensive and quite possibly dangerous! It does work though, and I have one bike I prepared this way.
Buy some metal etch primer and the highest quality spray paint in a can that you can find. Two cans should do it. Plus a can of clear coat. The metal etch primer can be applied using a brush, and dries quickly. The top coats need to go on thin coats at a time, letting them dry before applying the next coat. This is very time consuming, but at the end you could well have a very professional looking job, and any spots you miss or mess up are your own fault.
Durability wise, the resulting paint job is OK. Just don't lean the bike on anything metal that has a sharp edge. Stones may chip the paint quite easily.
Basically, it's too time consuming and expensive to consider this option, particularly with the less than ideal durability.

DIY with good paint - looks good, but is time consuming, expensive and
not durable
4. DIY spray can, cheap
Prepare the frame as for the expensive spray can option. This step alone is not cheap!
Buy some metal etch primer, and the cheapest spray paint you can find. Instead of two cans, you will probably need four cans. No joke! Apply as for the expensive paint. Once again very time consuming, but the result may look very professional. Excellent, but...
Durability wise, this is a joke. don't lean the bike on anything, put it on a work stand, or even let your bike lock touch it! The paint will come off, and, if you are unlucky, it will stick to whatever rubbed against the bike better than it ever did to the bike.
Avoid this option at all costs!

DIY with cheap paint - already after the first ride it will be marked
Other paints - POR-15
After seeing all the great ads for POR-15 I decided to give it a go. They say it can be brushed on and will not leave brush marks. This did not happen for me. I tried the black POR-15 for high wear items like pedals, but it still came off. I tried the two-part clear coat, and that seems pretty durable, but it dissolves decals, so I don't use it. After spending over $100 on experimental POR-15 paints that I couldn't make work well, I gave up.
Pricing
For the garnet blasting, Escort Metal Polishers in Christchurch charge $40 for a frame plus forks, or $50 for a tandem frame with forks. Turn-around is about a day or two. What more could one ask for?
For enamel painting, Industrial Painters in Christchurch charge $50 to paint a tandem frame and forks in white. I believe a single frame and forks costs $40. Depending on the colour, this takes a week or two. Results are generally perfectly adequate, but if you want to go to the next level of quality you could try James Lee Design. They will go to great lengths to achieve the look you desire and charge accordingly. Check out a De Rosa and Eddy Merckx they painted.
Powdertech in Christchurch charge $100 for the garnet blasting and powdercoating of a single frame and forks. Easy, one step procedure if you want it done in powder.
Plasticoat metal 2 in 1 protekt top quality spray paint in a can, $16.50 from places like Guthrie Bowron. Remember you will need at least two cans, plus a can of clear if you want a high gloss finish.
Fiddly Bits 250g yellow, $5.04 per can from Bunnings. What can I say; I do not recommend using this paint for bikes.
Note: prices valid as at 2007.
First Gear is copyright 2006-2008
Martin van den Nieuwelaar
Last updated 11 Jul 2010
